Arduino IOT Cloud Automation with ESP32
/*
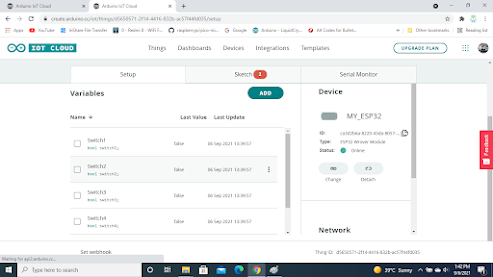
Sketch generated by the Arduino IoT Cloud Thing "HomeAutomation"
https://create.arduino.cc/cloud/things/79deb777-3561-4c89-b2b3-8cf67ac826e3
Arduino IoT Cloud Vssh ariables description
The following variables are automatically generated and updated when changes are made to the Thing
bool switch3;
bool switch4;
bool switch2;
bool switch1;
Variables which are marked as READ/WRITE in the Cloud Thing will also have functions
which are called when their values are changed from the Dashboard.
These functions are generated with the Thing and added at the end of this sketch.
*/
#include "thingProperties.h"
void setup() {
pinMode(16, OUTPUT); # connect relay 1 to pin RX2 of ESP32
pinMode(17, OUTPUT); # connect relay 2 to pin TX2 of ESP32
pinMode(18, OUTPUT); # connect relay 3 to pin 18 of ESP32
pinMode(19, OUTPUT); # connect relay 4 to pin 19 of ESP32
// Initialize serial and wait for port to open:
Serial.begin(9600);
// This delay gives the chance to wait for a Serial Monitor without blocking if none is found
delay(1500);
// Defined in thingProperties.h
initProperties();
// Connect to Arduino IoT Cloud
ArduinoCloud.begin(ArduinoIoTPreferredConnection);
/*
The following function allows you to obtain more information
related to the state of network and IoT Cloud connection and errors
the higher number the more granular information you’ll get.
The default is 0 (only errors).
Maximum is 4
*/
setDebugMessageLevel(2);
ArduinoCloud.printDebugInfo();
}
void loop() {
ArduinoCloud.update();
// Your code here
}
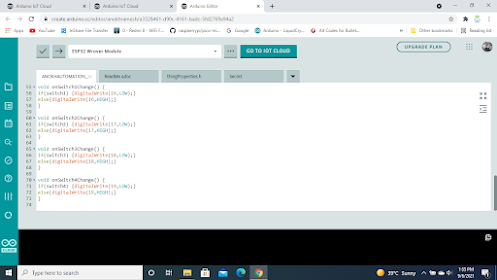
void onSwitch1Change() {
if (switch1)
{
digitalWrite(16, LOW);
}
else
{
digitalWrite(16, HIGH);
}
}
void onSwitch2Change() {
if (switch2)
{
digitalWrite(17, LOW);
}
else
{
digitalWrite(17, HIGH);
}
}
void onSwitch3Change() {
if (switch3)
{
digitalWrite(18, LOW);
}
else
{
digitalWrite(18, HIGH);
}
}
void onSwitch4Change() {
if (switch4)
{
digitalWrite(19, LOW);
}
else
{
digitalWrite(19, HIGH);
}
}


Comments
Post a Comment